Free, long-duration SSL when your cPanel Host is Greedy
Unfortunately a number of cPanel hosts (GoDaddy, Namecheap, most providers that are considered “volume web hosts”) disable the built-in AutoSSL functionality in cPanel (and don’t use our plugin either), that provides free and automatic SSL, in order to avoid cannibalizing their own SSL sale revenues. In some circumstances, the only way to install certificates is by emailing support, which is not practical every 60-90 days.
With the advent of Let’s Encrypt, the “free” question is addressed, but it is incredibly inconvenient to use Let’s Encrypt in a manual manner, and in my opinion antithetical to the aims of Let’s Encrypt.
If you are stuck on one of these cPanel hosts and want free SSL: you don’t have to use Let’s Encrypt.
There are other options.
AlwaysOnSSL is a former Symantec (now Digicert) brand, that is commercial/for-profit, but will provide free 12-month duration SSL, multi-doman certificates, as long as you register an account with them and generate your own Certificate Signing Request (CSR).
This will briefly show you how to combine cPanel and AlwaysOnSSL to get you 12-month certificates.
Issuing a certificate
1. Login to your cPanel account and generate a CSR
You need to generate a private key and certificate signing request (CSR) before you continue.
For demonstrative purposes, we will be aiming to issue a multi-domain certificate for example.org, www.example.org.
Once logged into cPanel, head to SSL/TLS -> Generate, view, or delete SSL certificate signing requests.
Fill in the details, leaving optional fields blank:
- Key: Generate a new 2048-bit key
- Domains:
example.org
www.example.org
- City, State, Country, Company: anything
and press Generate.
You should see some text beginning with -----BEGIN CERTIFICATE REQUEST-----. This is your CSR. Leave this screen open and continue.
2. Open an Account with AlwaysOnSSL and login
Unlike with Let’s Encrypt, account registration is fairly explicit/traditional, so do that now.
3. Submit your CSR to AlwaysOnSSL
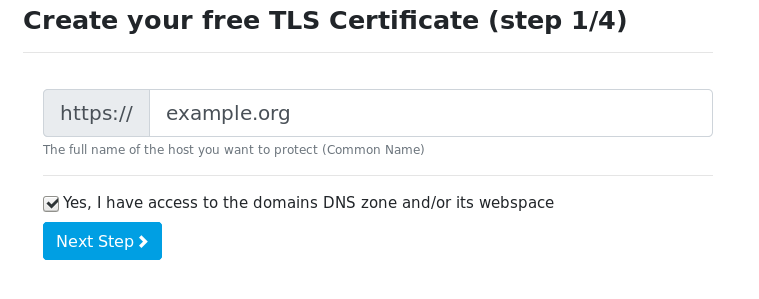
While logged in on the AlwaysOnSSL homepage, enter the first name on your certificate and tick the box:
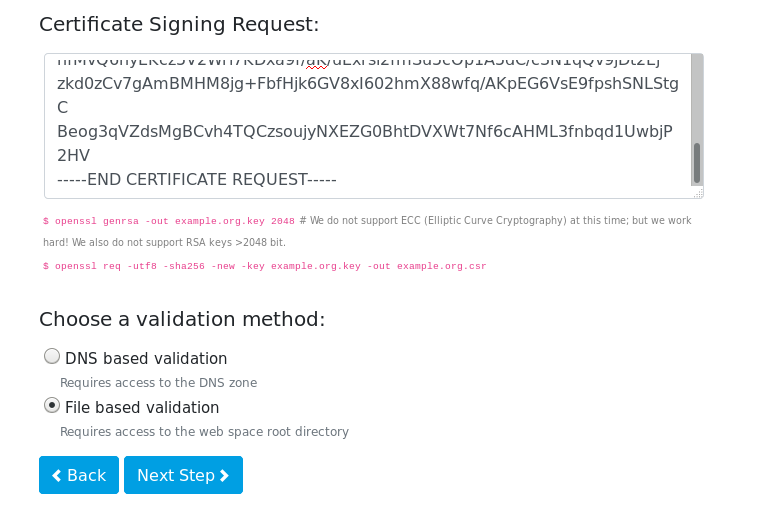
On the next screen, paste your CSR into the provided text box, and then choose File-based validation and continue:
4. Perform the Domain Control Validation
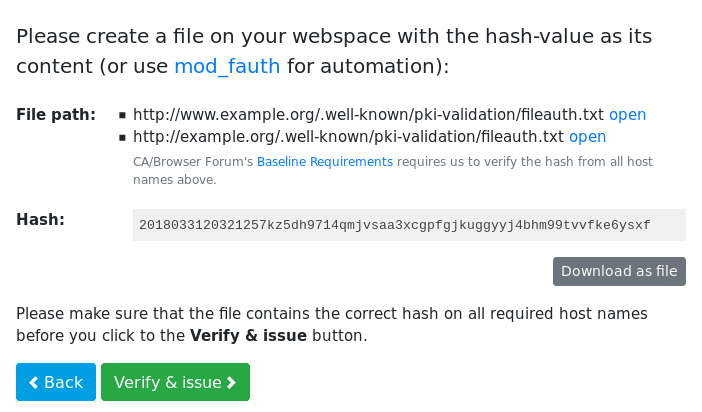
You will be prompted to upload a file to your domain(s) in the following manner:
You can do this via the usual cPanel methods - be it via the File Manager, FTP, SSH, or whatever you use to manage your website.
The content of the file must match the shown Hash value. You should verify that you can visit this file in your browser before you continue.
5. Issue and Download the Certificate
Once you hit Verify & Issue, you should be presented with a list of your certificates:
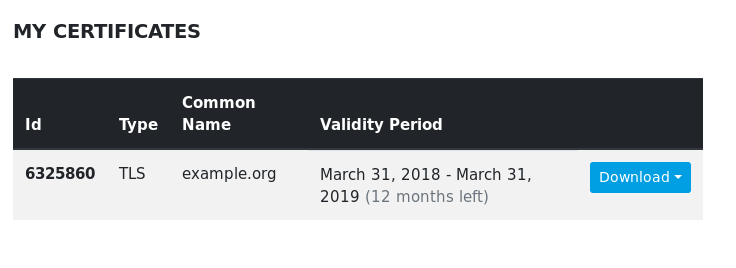
Press Download -> Server Certificate and download the file.
6. Install the certificate to cPanel
Next, head back to cPanel, and navigate to SSL/TLS->Manage SSL sites.
Scroll down to Install an SSL Website.
- Under Domain, select your cPanel virtualhost to which you want to install this certificate:
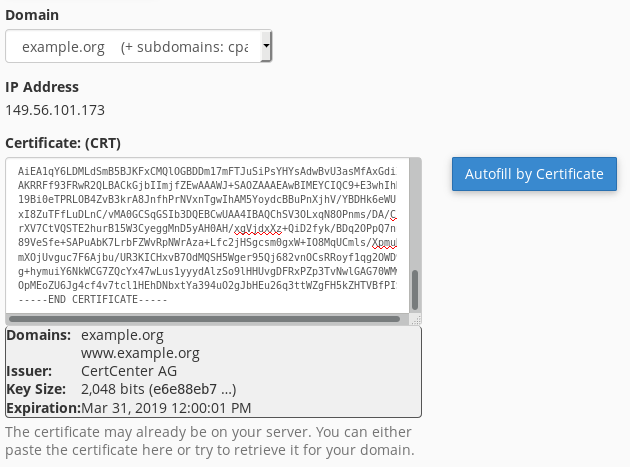
- Under Certificate: (CRT), paste the contents of the certificate you just downloaded from AlwaysOnSSL.
- Press Autofill by Certificate, which will automatically fill in the Private Key and CA bundle.
Scroll down and press Install Certifictate and you’re done. Rinse and repeat in 11-12 months time.